Plan
So you have seen a river on a map. You have a packraft. You want to explore new places. But how do you get about it? Having paddled several rivers with no previous known descents or information, here is some advice built up from those experiences. Hopefully it can help you prepare and plan an epic trip of your own!
An short example for each is given in cursive below each point.
1. Surf, a basic search
There is no point in generating the extra work and jumping in at the deep end if someone else has already done the work for you. Your best friend to start with will be a search engine and a few well-chosen key words. Spend some time sifting through it and you may come up with a previous expedition, pictures and valuable information. It may not concern paddling but you can discover other important information such as historical accounts, legislation or future development. Keep it all on board for later. Sometimes it may just be tantalising morsels that will make you want to get out there even more. If you don’t find anything else, its time to get more specific.
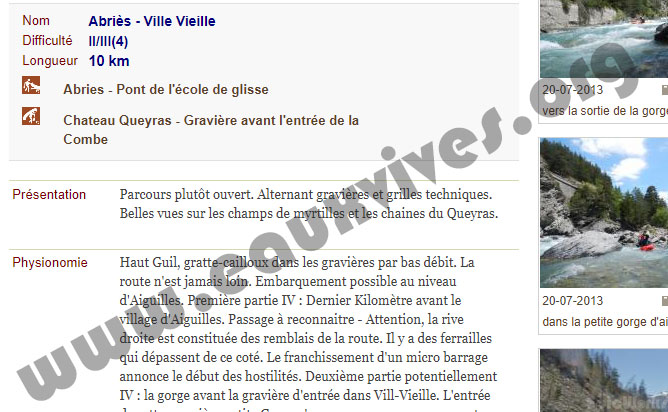
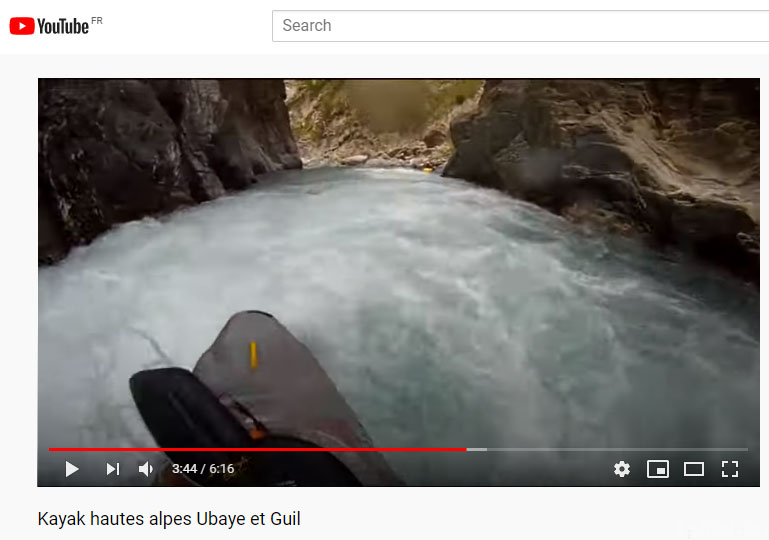
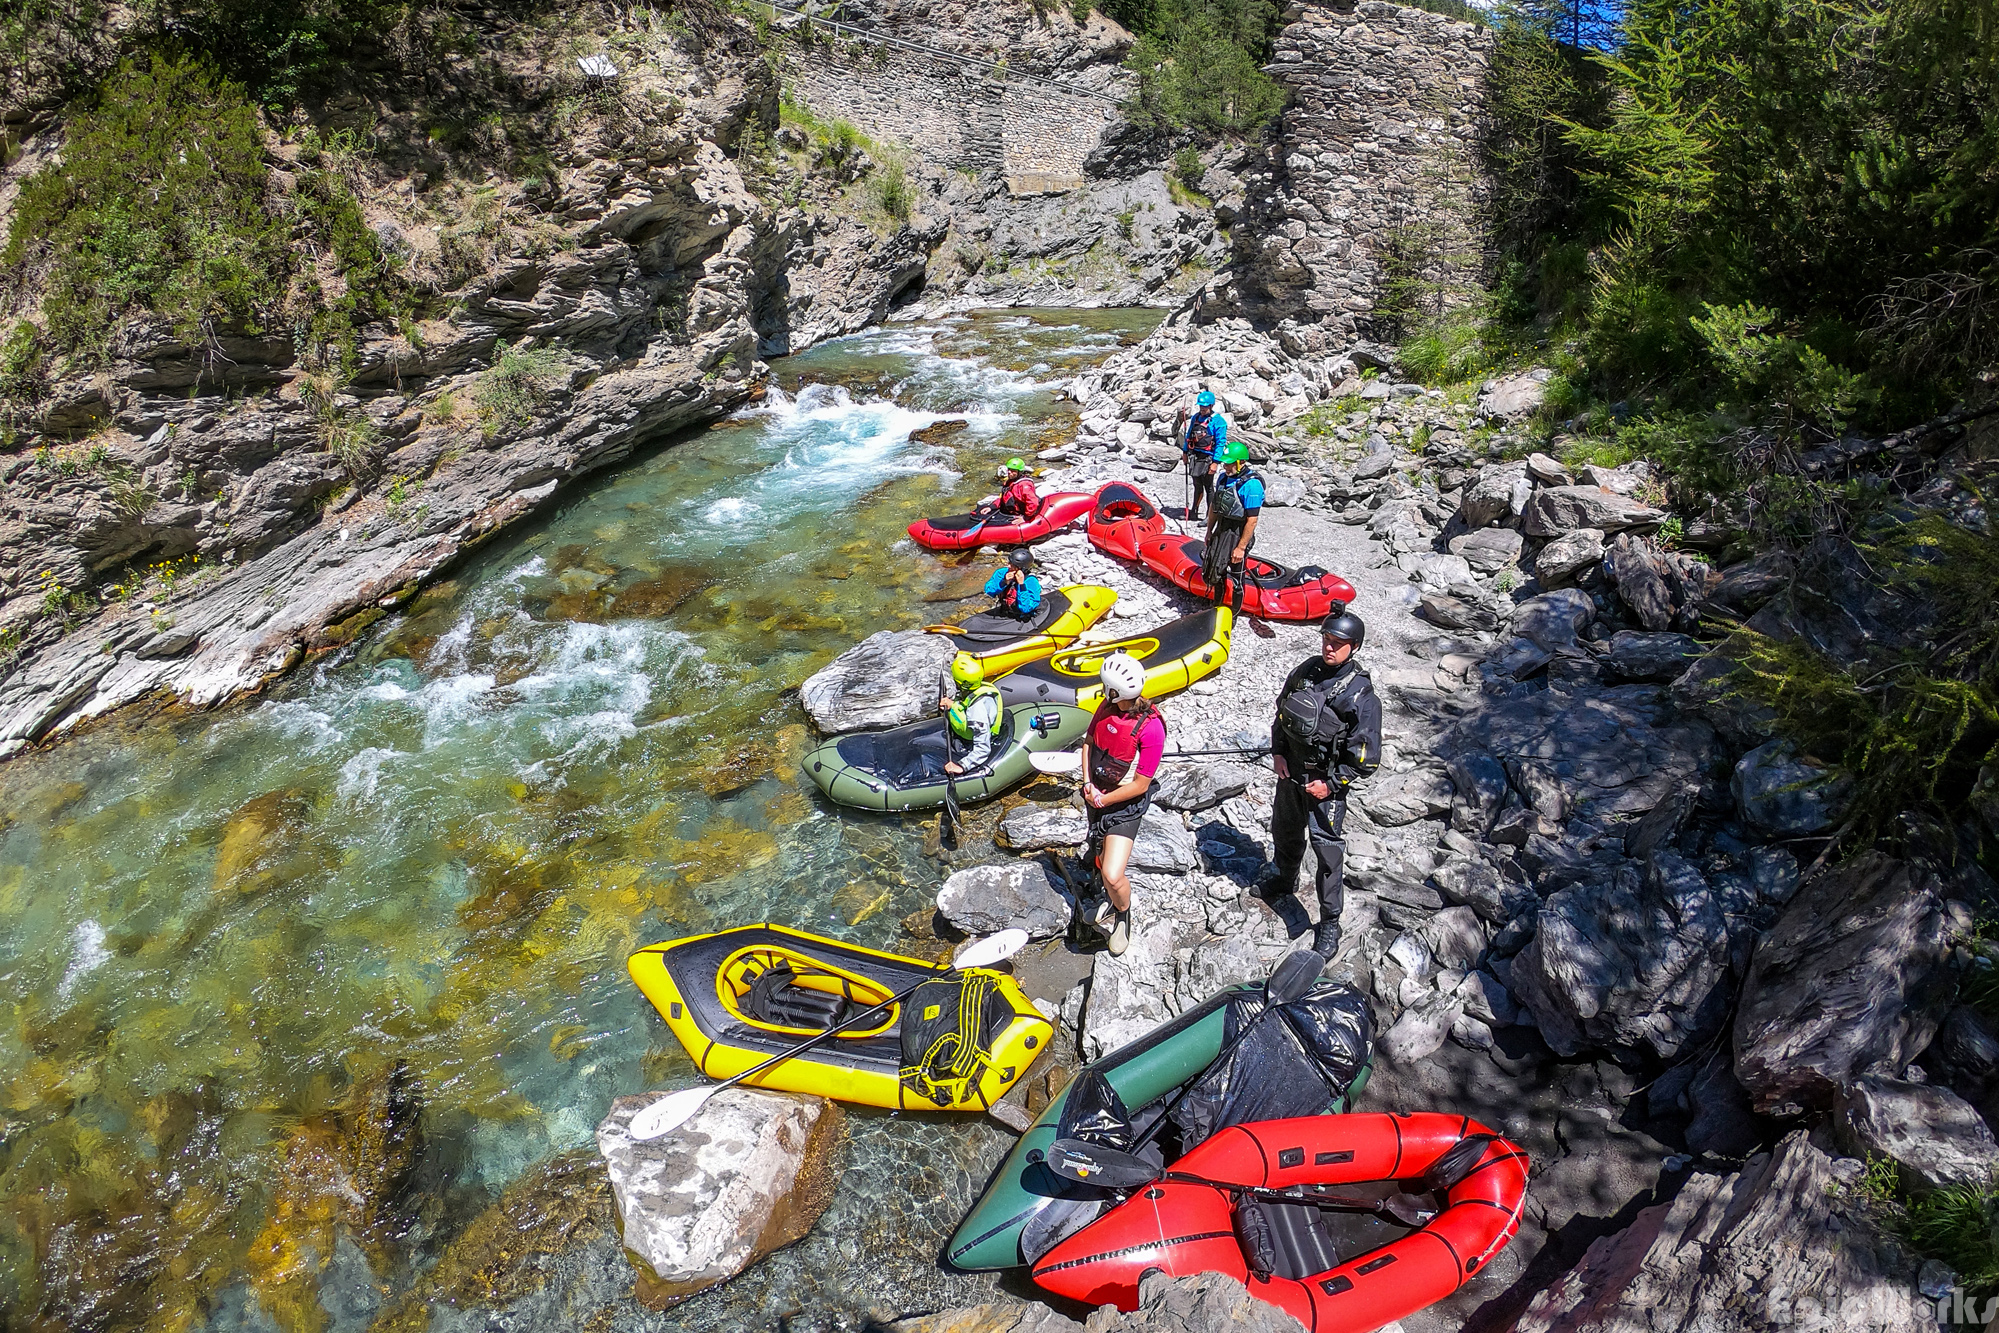
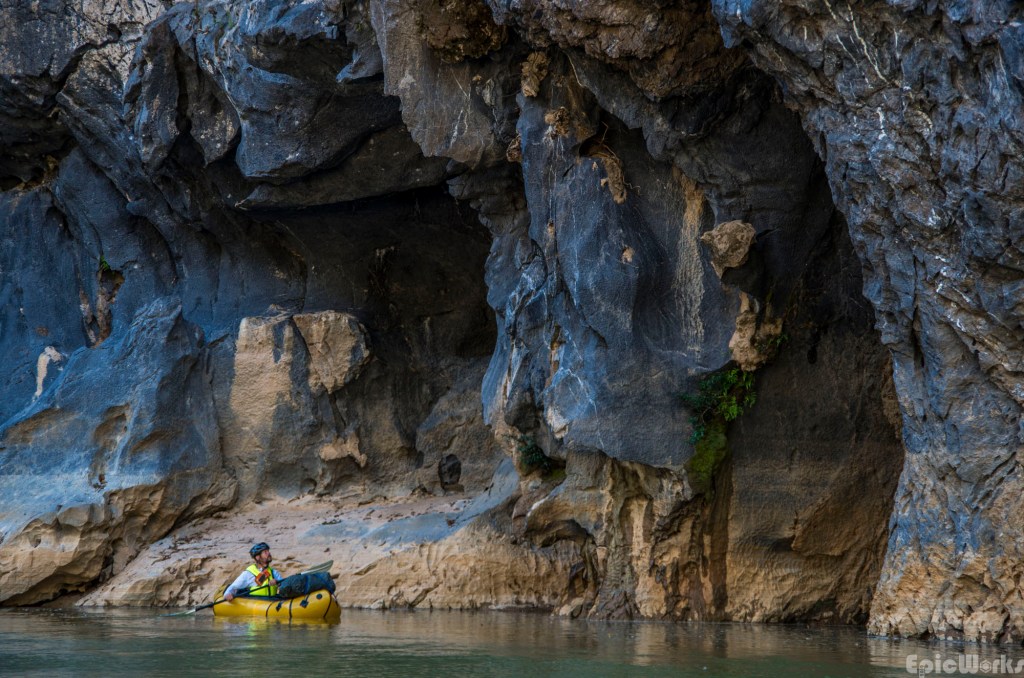
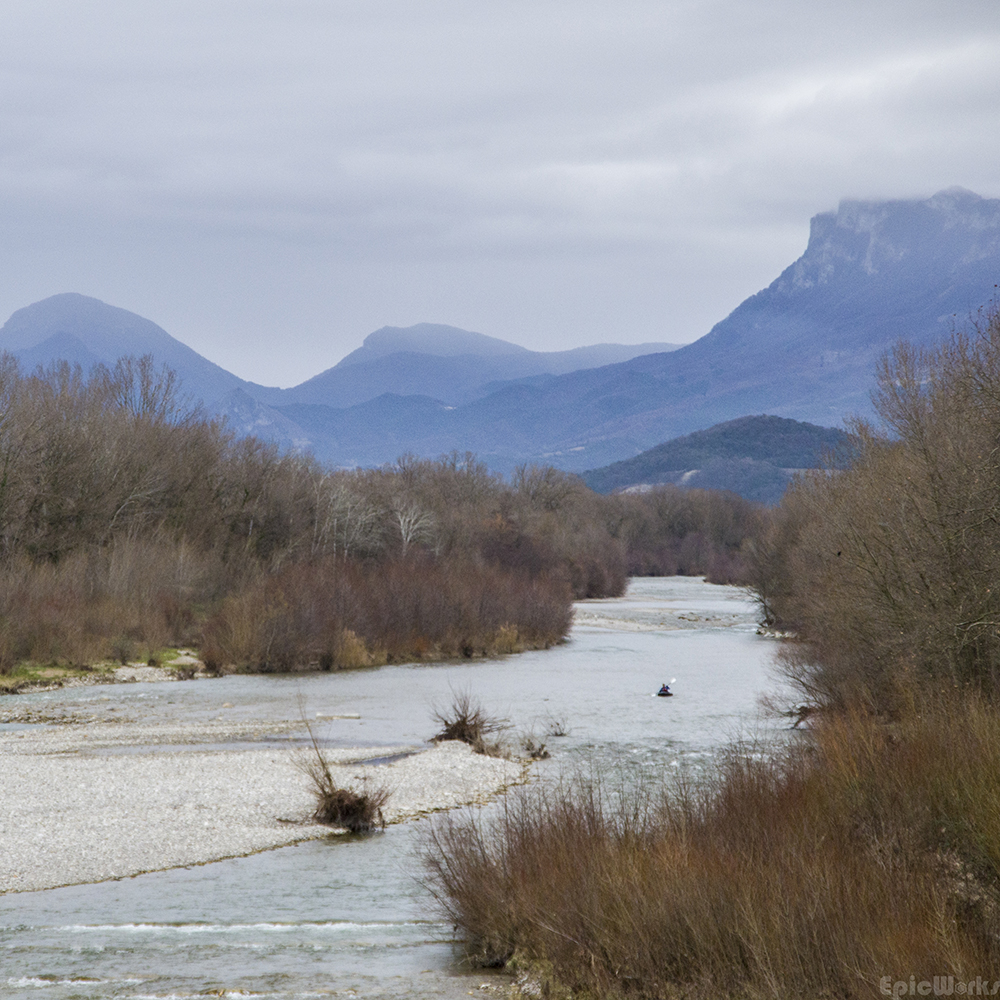
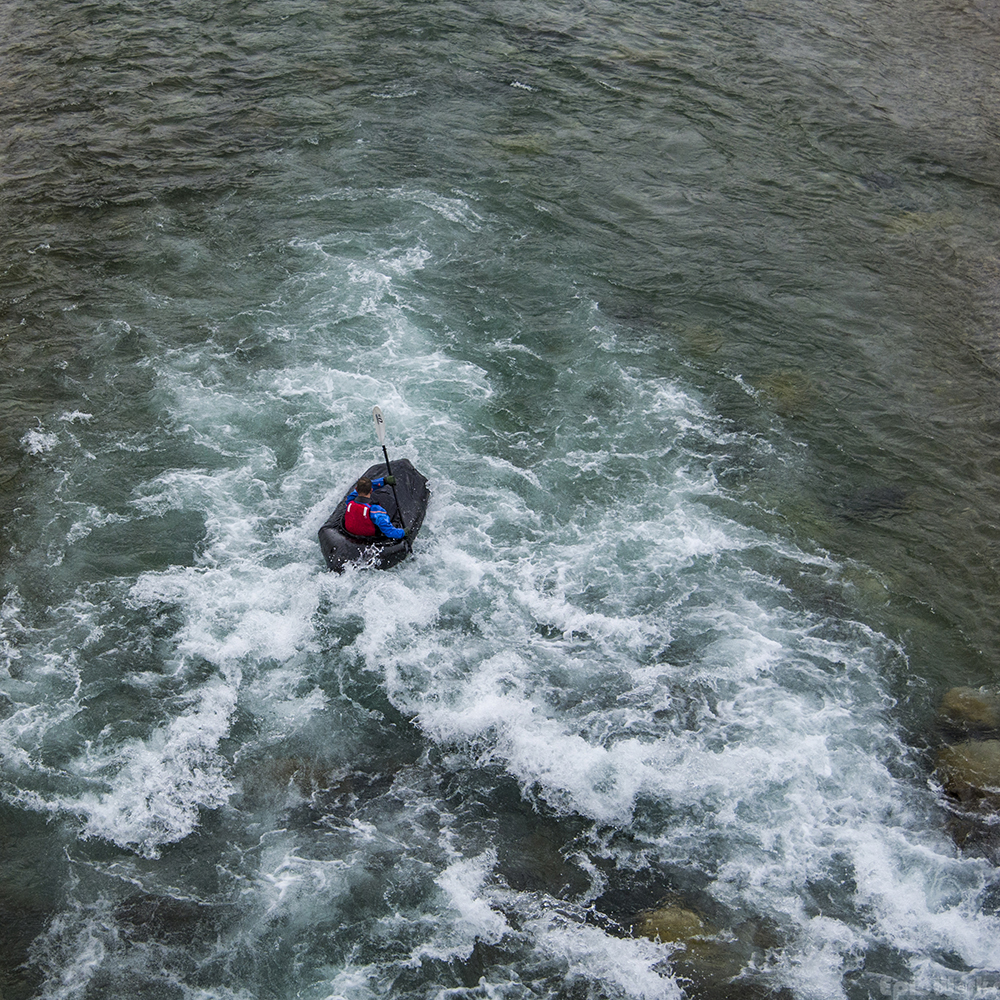
Example 1: Haute Guil, France. In many countries there are online reports (1)) and even videos (2) that gan give you an idea of what to expect. Actual picture of the river (3)
2. Bailing Issues
You have now enter the real planning phase. These are some basic considerations you need to evaluate before you decide to go further and spend the time of a proper plan.
Geopolitical Legal requirements. Can you actually access the river? If you can’t get a visa for the country in question, maybe you should look elsewhere. Check legal requirements, if it’s in a protected or military exclusion zone and your government’s advice concerning travel in the region. Failure to do so can result in disappointment later. Red tape is perhaps the most annoying and important limitation to many expeditions.
Topological The general layout of the river and the landscape around it. Is it accessible, can you hike in and out of there? Once again, this check is more about discarding impossible scenarios out of your scope rather than going into detail.
Meteorological The weather. Check average temperatures and rainfall. Are there any seasonal variations or strong weather patterns such as monsoons or hurricanes/typhoons? Do the rivers freeze in winter? This will give you the best period of the year to attempt your challenge and start to give you an idea of the gear and preparation needed.


Example 2. Geopolitical issues: the Caucassus is home to many incredible rivers, but better stay away from Dagestan for now (1). If you are going to paddle Skjálfandafljót, Iceland, check the snow level and either pack or plan accordingly (2). Typhoons or monsoons are common in some regions. For south-east Asia late autumn is a good period to paddle, such as on the Nam Ngum, Laos. (3)
3. Jump In! Study your river.
With the general points out of the way you have decided you want to attempt the descent. It is time to get more specific and more technical. The following methodology is proposed to help you simplify the planning and generate enough information for you to navigate the river in an exploratory fashion. It also explains how to prepare if you want offline access on your smartphone while paddling. Feel free to improvise and improve it in function of your needs.
To perform the next part you will need several programs, all of which are free (links are provided at the bottom). There will be two parts to the planning, determining:
3.1 Average properties: Length and Gradient
How to create a track. You will need to generate a track of the river. Open up Google Earth Pro (desktop version) and start by tracking the section of the river you are interested in. To do this click on the tracking tool (1) and start a track at the put in. Follow the river until the end (patience!) (2). This will give you two important pieces of information: the length and gradient. To access them, right click on the track you generated and select Show Elevation Profile (3).

Example 3. Creating a track, Nam Ngum, Laos. Click to enlarge. First select the track tool and follow the river. Then select the track to generate a profile. Finally calculate the gradient and partial distances. In this example there is an initial moderate region, with some rapids. The following 7 km of river a has a much steeper incline.
Length. The length will be given beneath the profile. By knowing exactly how long the section of river you are attempting is, you can estimate the duration of the trip. This will of course depend on your average speed, which is the sum of your paddling and the current. A packraft moves at roughly 2-4 km/h on flat water, but you need to measure your own speed. Remember that technical sections with scouting or portage will severely reduce your speed.
Gradient. To obtain the gradient of the different sections check the profile. A river can have several sections with various gradients, so you should extract local gradients. To calculate the gradient for a certain section, measure the difference in height and distance from the beginning to the end. Calculate the loss in height and divide by the distance to obtain a value of height loss per unit of length (m/km). You can then assign a value of gradient to the different sections
The gradient is important as it will tell you how steep the river will be and if you should expect a lot of rapids or not. A zero gradient is of course flat water. You can express in different units, but I have chosen to do so in m/km. This means that for every kilometre of river you will drop x metres.
Remember, this is an average! There may be just one large waterfall or a constant gradual rapid. But in all cases the higher the gradient the more careful you should be.
3.2 Points of Interest
For this part you will be trying to identify the location of multiple points of interest using both maps and satellite imagery. By using Google Earth you can both study the images and use it to edit and create a list of points of interest. It is recommendable to use complementary sources, for example satellite images from AppleMaps can have higher resolution, and open source cartography often contains detailed trails. Local maps or cartography data can also help (see here for more). So if you want to be thorough cross-check them against each other. For more information of mapping ressources you can check here. When searching for points of interest, these include but are not limited to:
- Rapids: Look at the river and try and identify waves or waterfalls. White water is often clearly visible. Create a marker for each and number them. You can add a tentative description such as their size or length.
- Potential take outs: check for paths and roads in case you need to get off the river. Cross check with satellite images, sometimes a path on a map doesn’t exist anymore!
- Villages and potential campsites: You will probably want to camp out of sight from a village, so knowing that there is one just round the bend can be useful.
- Gradient changes: By using the profile tool you can determine where the gradient change from one section to another occurs. You can add a marker for this too.
- Other features (manmade or otherwise): dams, reservoirs and weirs. These can often be dangerous. Bridges and harbours as well as other information about the river (shallow, wide…)
You should now have a folder in Google Earth with one track and many markers highlighting all your of your points of interest.

Example 4. Nam Ou, Laos. Using the Add Placemark tool, add a marker where there is a point of interest (1). Comparison between the googleearth and applemaps of the same rapid, made during the preparation of an expedition (2). Picture of the rapid when we encountered it, and decided to portage around.
Export the data. To do this, left click on the folder and chose save place as. Choose the name and save as a .kmz file. You can now load it into the map reader of your choice. As you will hopefully be in the middle of nowhere you want an offline map that doesn’t need an internet connection. For example you can use maps.me or similar. This will give you a generic base map, onto which you will load your track and points of interest. By using your phone’s GPS you will always know where you are relative to the the river. To load it onto your phone simply send yourself the .kmz file (by email for example) attached from your computer. Open the file and choose the map reader.


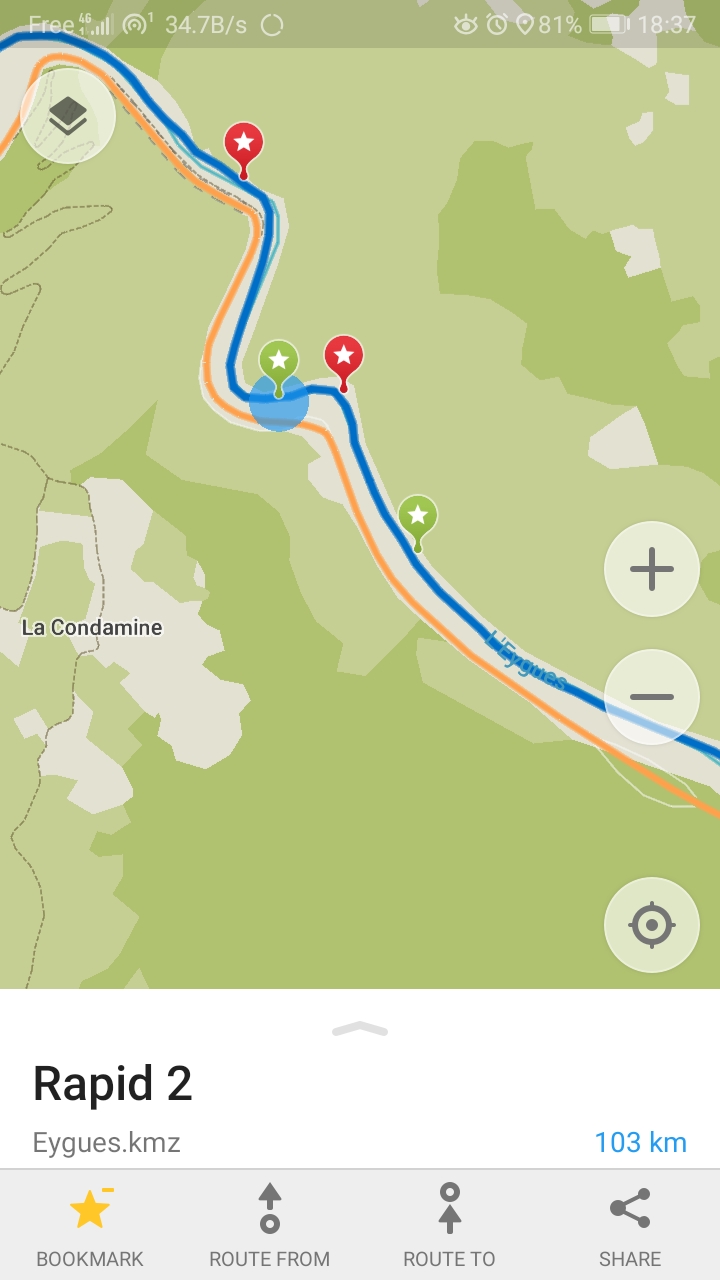
Example 5. River Eygues, France. Once we have generated the track and waypoints, save it all as a .kmz (1). Screenshots of the maps.me app with the file loaded showing the river and different points of interest (2-4)
Finally if you are uncertain about using your phone on the water or want a back-up in case of phone failure, you can follow through with a paper copy. Simply measure where each point of interest is, relative to your track, using the profile tool. Write down the distance from the put in with the POI’s description. By checking how far you have advanced against this list you can know what to expect around the corner!
Hopefully this methodology will help you save time when you are on the river and can hear the next rapid around the corner. For example if a big rapid goes around the corner and finishes in a weir it might be better to simply get out and start carrying rather than waste time scouting. It will improve your security by knowing what to expect, but remember to always scout if you cannot see clearly. Take out points can also be critical if you need to leave in a hurry or if there is an accident.
4. Look Outside: River conditions
Finally, before setting off, the last thing to do is check the current conditions (!). These include weather forecast and any information available about the rivers flow and volume.
For the forecast you can use the national service or one of many weather apps. I recommend using windy because it allows you to easily compare different prediction models and choose your altitude.
For the river conditions it can be much more complicated and information is often scarce. Some national meteorological agencies will list information, as will some water distribution agencies. In some cases the flow is given, in others the temperature. Both can be very importan

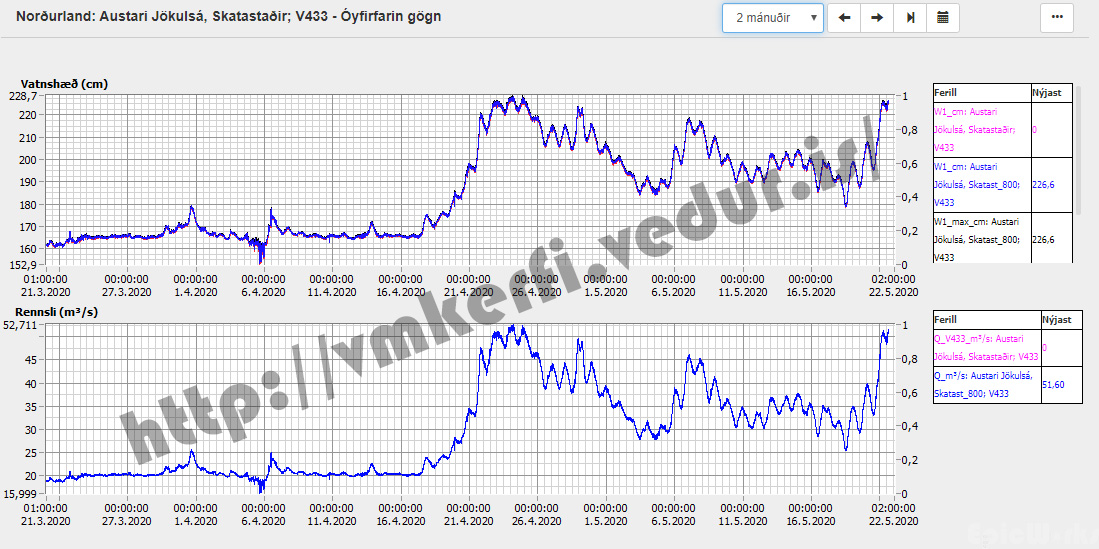
Example 6. Weather conditions. Austari Jokulsá, Iceland. Check local weather and forecast sites for water volumes, flooding and temperatures as well as weather patterns (1-2). During our descent the water was very cold! (3)
Pack
This section offers a brief overview of some of the minimal gear you will need for a multi-day rafting trip. There is a lot of information on this topic out there and it often boils down to personal choice and economic factors. Like most nomadic travel you want to take the minimum and keep things light. This will make it easier both on and off the water, but especially if you need to carry in difficult terrain. Here is a short list of the different items you should bring:
Paddling Essentials
- Packraft and folding Paddles
- Inflation bag
- Repair kit
- Dry bags
- Personal flotation device
- Throw rope and knife.
You only need one inflation bag for the team, but multiple repair patches, especially in remote areas. Dry bag everything important twice, water does get in. Don’t use an inflatable PFD, I’ve done it and when they puncture in the middle of nowhere it’s not a great feeling!


Camping Gear
- Tent or hammock and ground mat
- Sleeping bag
- First aid kit
- Toiletries
- Cooking equipment
- Water filtration and disinfection
The choice of sleeping arrangements is very personal. First aid is not and should cover the minim, read up on the subject! You can save the extra weight by sawing your tootbrush in half! You are old enough to know how to cook your food. For water purification a filter plus tablets and/or boiling will do the trick.
Clothing and protection
Like sleeping arrangements it will be both personal and weather dependent. For colder climates a dry suit will be both added security and comfort. In warmer lands remember sunscreen and glasses, polarised if possible. Like most gear it’s optional, it just depends of how rough you like it and how much you want to carry.
Electronics
- Cameras
- Smartphones
- GPS watch
- Safety beacon or satellite phone
- Power sources
Cameras and recording equipment are not discussed here (you can see some opinions here). In any case waterproof or water resistant will always be better for paddling sports. Smartphones have become more useful and now can be used for navigation. You can read you position and load up points of interest as well as offline maps. They can also be used in an emergency if there is some coverage. Most modern models can last for 5-6 days if used sparingly. A GPS watch is a useful addition as it can generate average speeds and tracking to help with decision making. Being waterproof they are easily accessible and can be checked regularly. A satellite safety beacon can give you peace of mind if heading into very remote areas, and can set off an emergency search and rescue mission if things go very wrong. To charge all this gear you can use power banks for shorter trips and solar panels for longer adventures. Water turbines could be an option by so far I have had no experience with them.

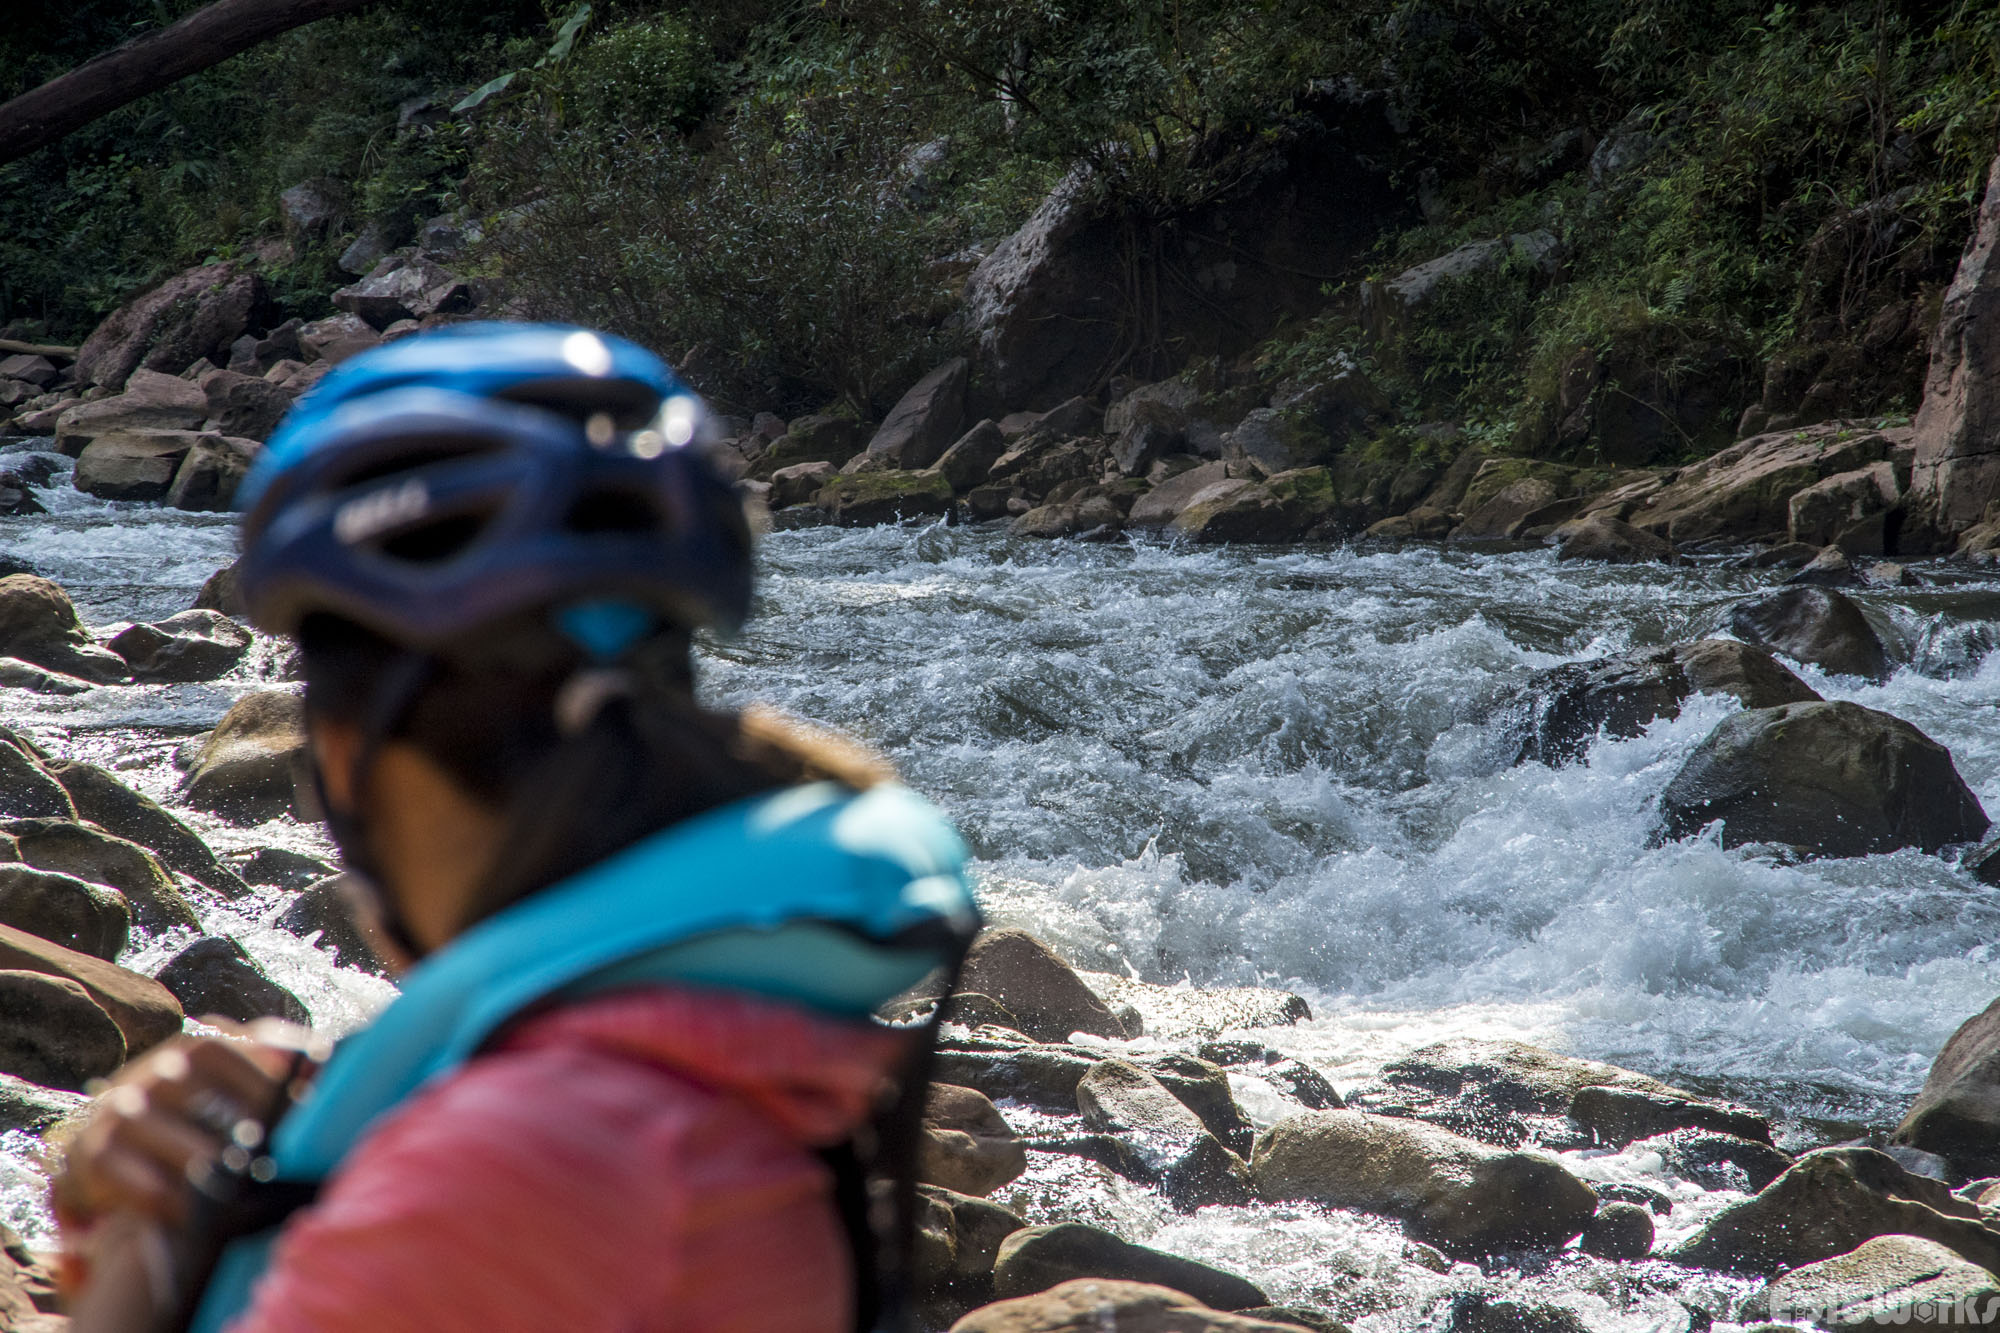
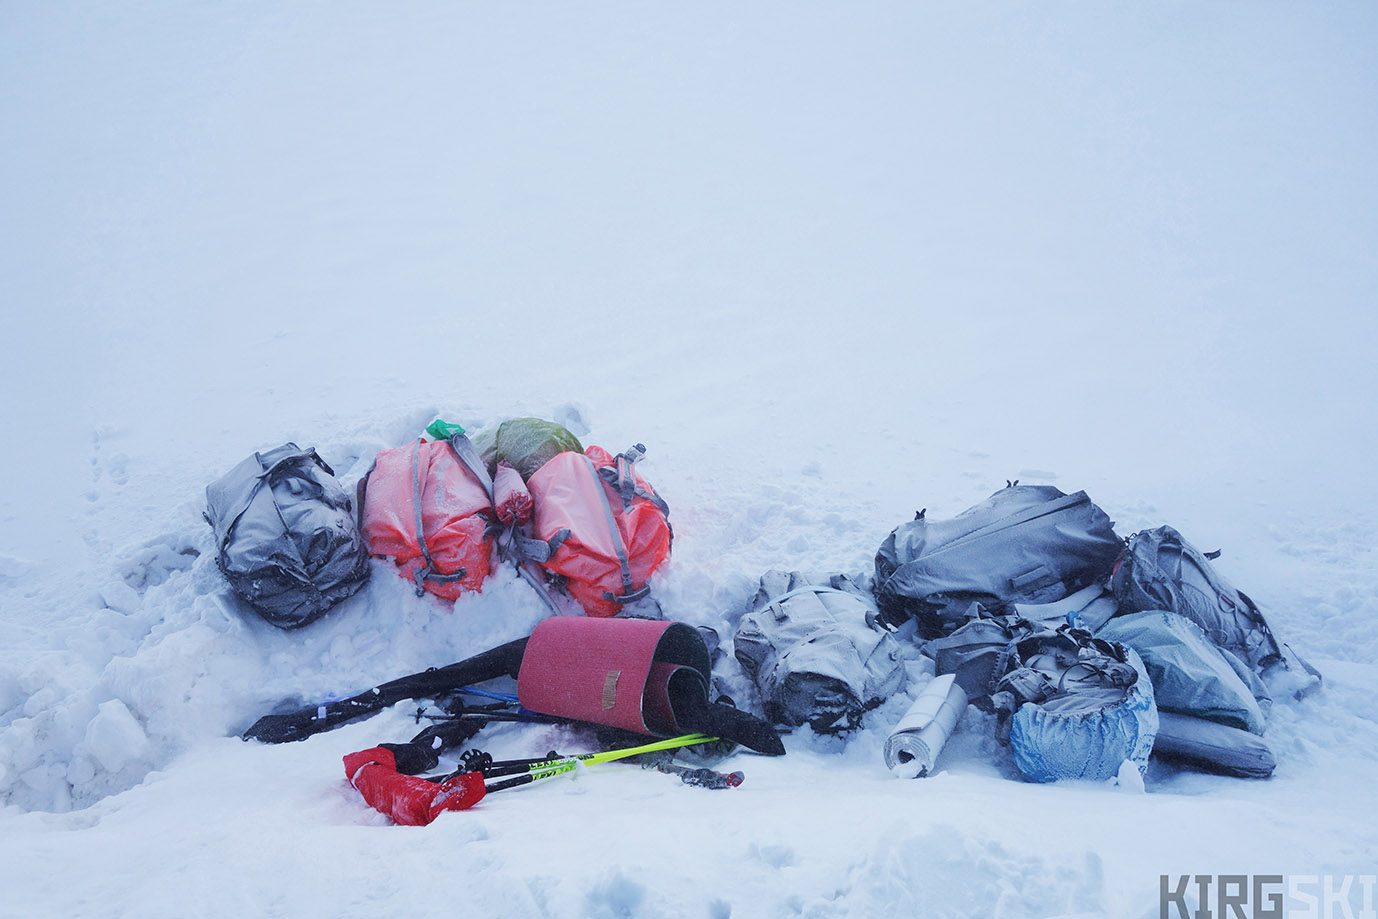
Nam Ngum, Laos. All our gear for a week on the river, including food and camping supplies. Thats the beauty of packrafting! (bike helmets are not recommended!)
One final word on gear. Remember to check that all members of the team know how to use it! Not just their own, but the safety items such as GPS beacons and map reading. These often fall under the responsibility of one person, but if they are lost or hurt, the others may need to take over.
Raft!
After days of planning and travel you reach the river. It disappears around the first corner, into the unknown.
Unpack, have a snack, one last nervous pee and slip in. Make yourself comfortable and check that all is correctly strapped down. Is everyone ready?
Push off, watching the bank recede and feel the water fluttering against your legs. Dip the paddle, breathe out any residual tension: you are going on an adventure!
For any questions don’t hesistate to write a comment or mention if this is usefull. More packrafting soon, so subscribe! In the meantime you can check out our Icelandic expedition here, and I will be posting our Laos explorations very, very soon!
